Pits and Devices
The Pits & Devices section lets you manage all assets, whether individually or in bulk. It includes three key options:
Table of Contents
- Pits
- Adding and Editing an Asset
- Add or Edit an Asset
- Bulk Upload
- Devices
- Add or Edit a Device
- Bulk Uploads

- Pits – View and manage all registered pits in your organisation. Each asset shows all related details.
- Devices – Access and manage connected devices linked to specific pits for monitoring and reporting.
- Bulk Uploads – Quickly add multiple pits or devices at once by uploading a CSV file.
Pits
The Pits module provides an organised list of all registered pits within your organisation.
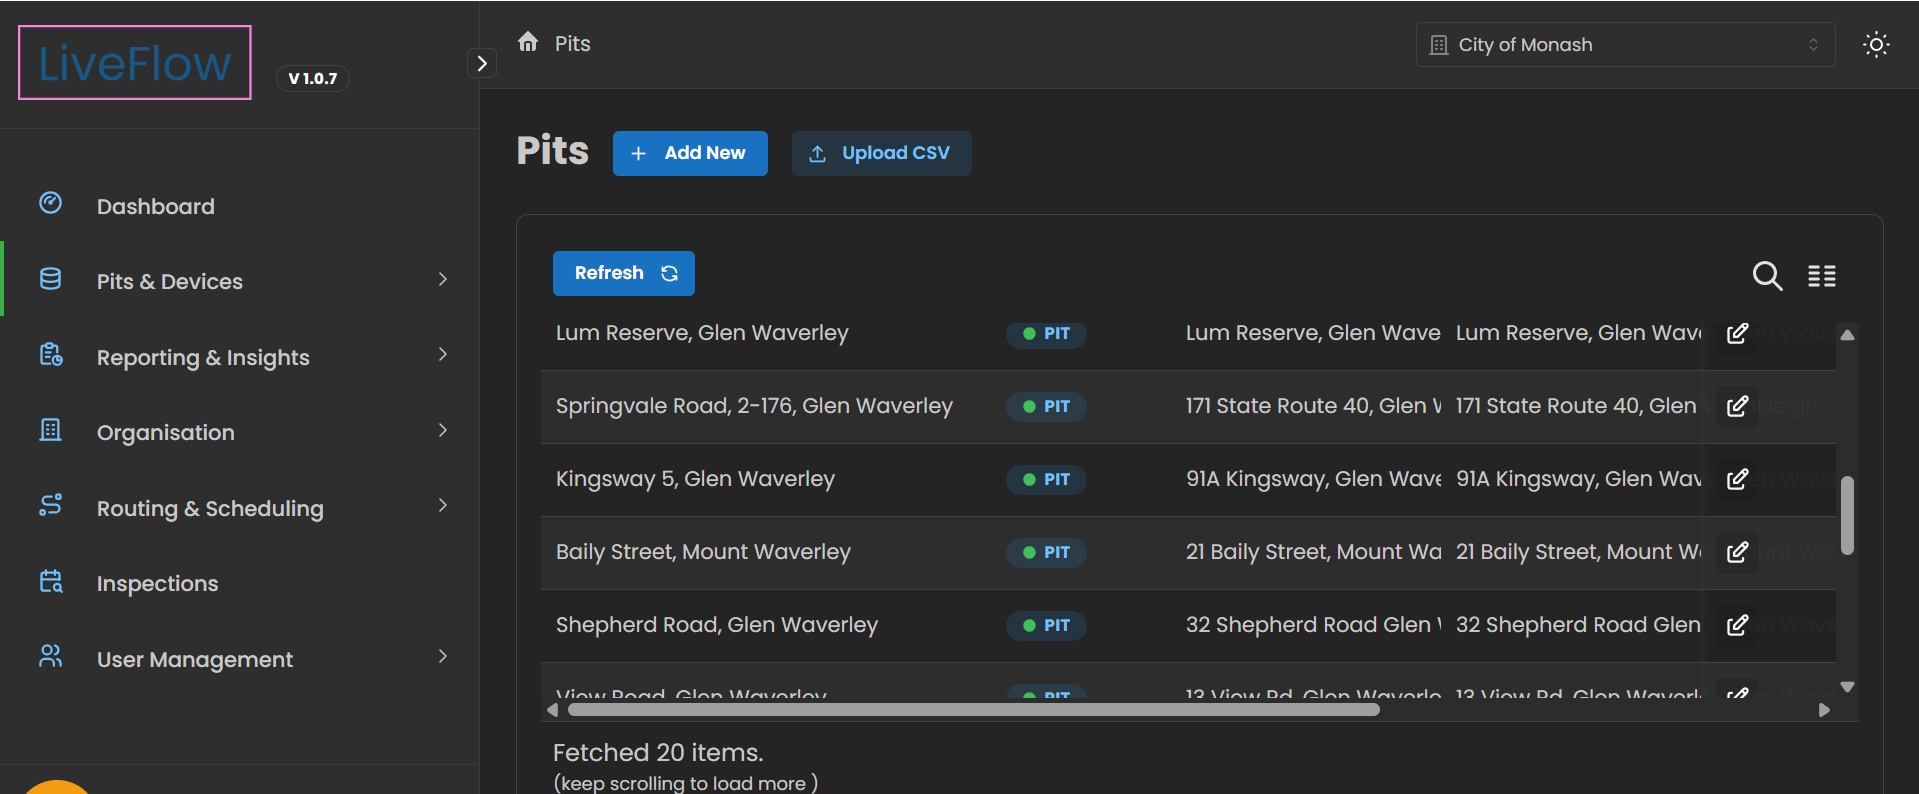
- Navigation – Access this section from the left-hand sidebar under Pits & Devices > Pits.
- Add New – Use the + Add New button to manually register a new pit.
- Bulk Upload – Upload multiple pits at once using the Upload CSV option.
- Refresh – Update the list to display the latest pit data.
- Search & Filter – Quickly locate pits using the built-in search bar or adjust the view with the list/grid toggle.
- Pit Records – Each row displays pit details such as location, asset ID, description, type, zone, device, tags and status.
- Edit Option – Use the pencil icon to edit information for any pit.
- Scroll & Load – More pit entries are automatically loaded as you scroll.
Adding and Editing an Asset
Whether you are adding a new asset or editing an existing one, the system brings you to the same Asset module.
- Add Asset – Accessed via the + Add New button, it opens the module with empty fields ready to be filled in.
- Edit Asset – Accessed by clicking the pencil icon next to an existing asset, it opens the same module but pre-populates the fields with existing data for you to update.
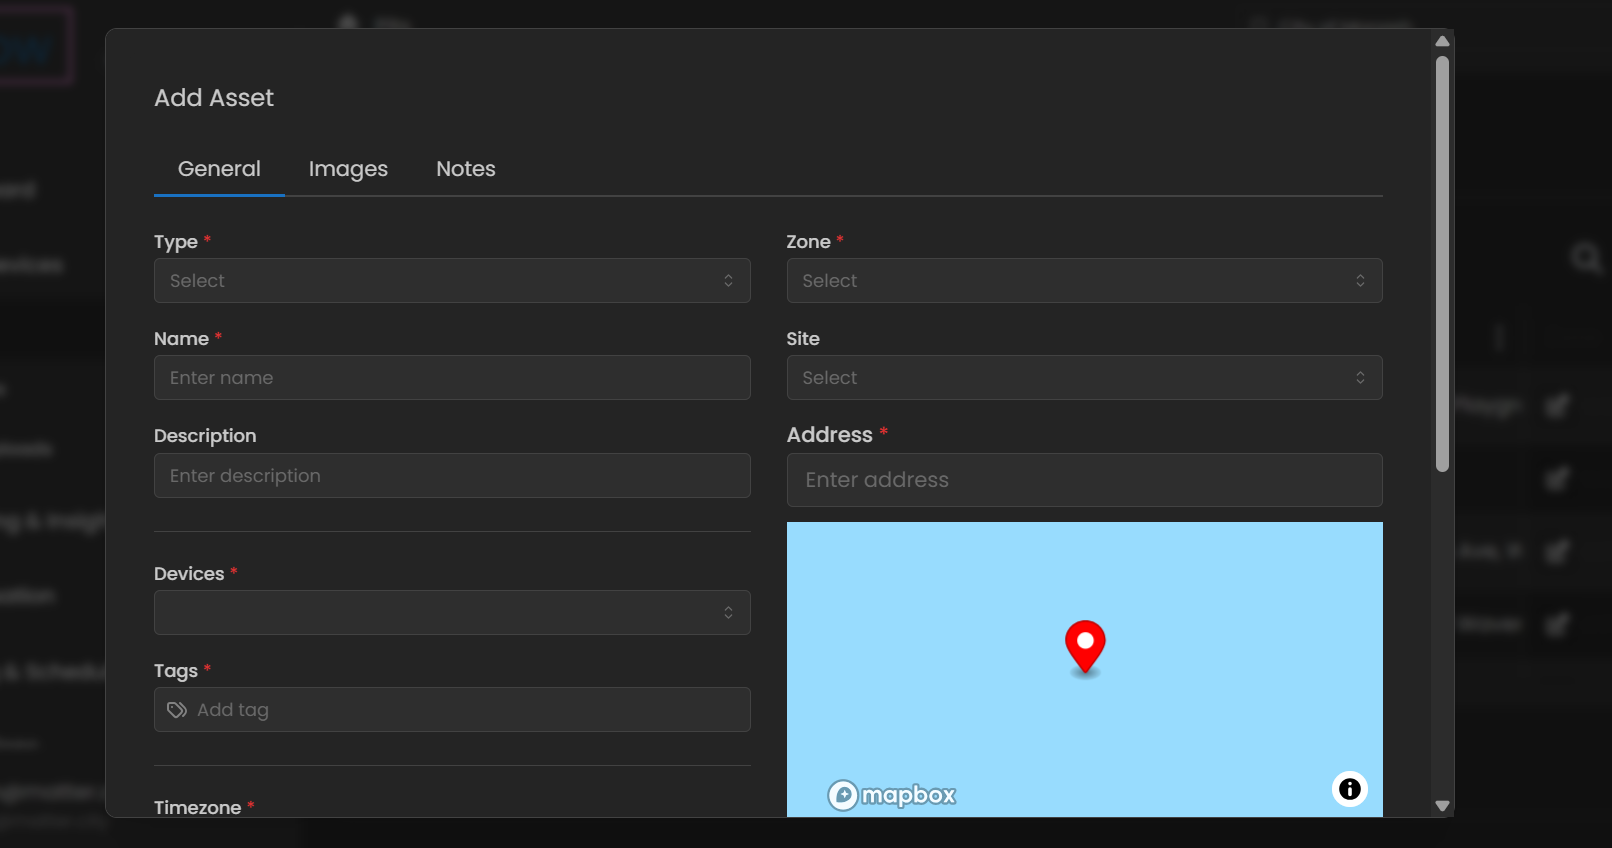
Add or Edit an Asset
The Asset panel is used both when adding a new asset and when editing an existing one, ensuring a consistent workflow for managing asset records.
-
Open the Panel
- Add New – Click the + Add New button to open the panel with blank fields ready for entry.
- Edit Existing – Click the pencil icon beside an asset to open the same panel with fields pre-filled for updates.
-
General Information (General Tab)
- Type – Select or change the asset category.
- Name – Enter a name (new asset) or adjust the existing name.
- Description – Add new details or refine current ones.
- Zone / Site / Address – Define or update location details.
- Devices / Tags – Link devices or apply new/updated tags.
-
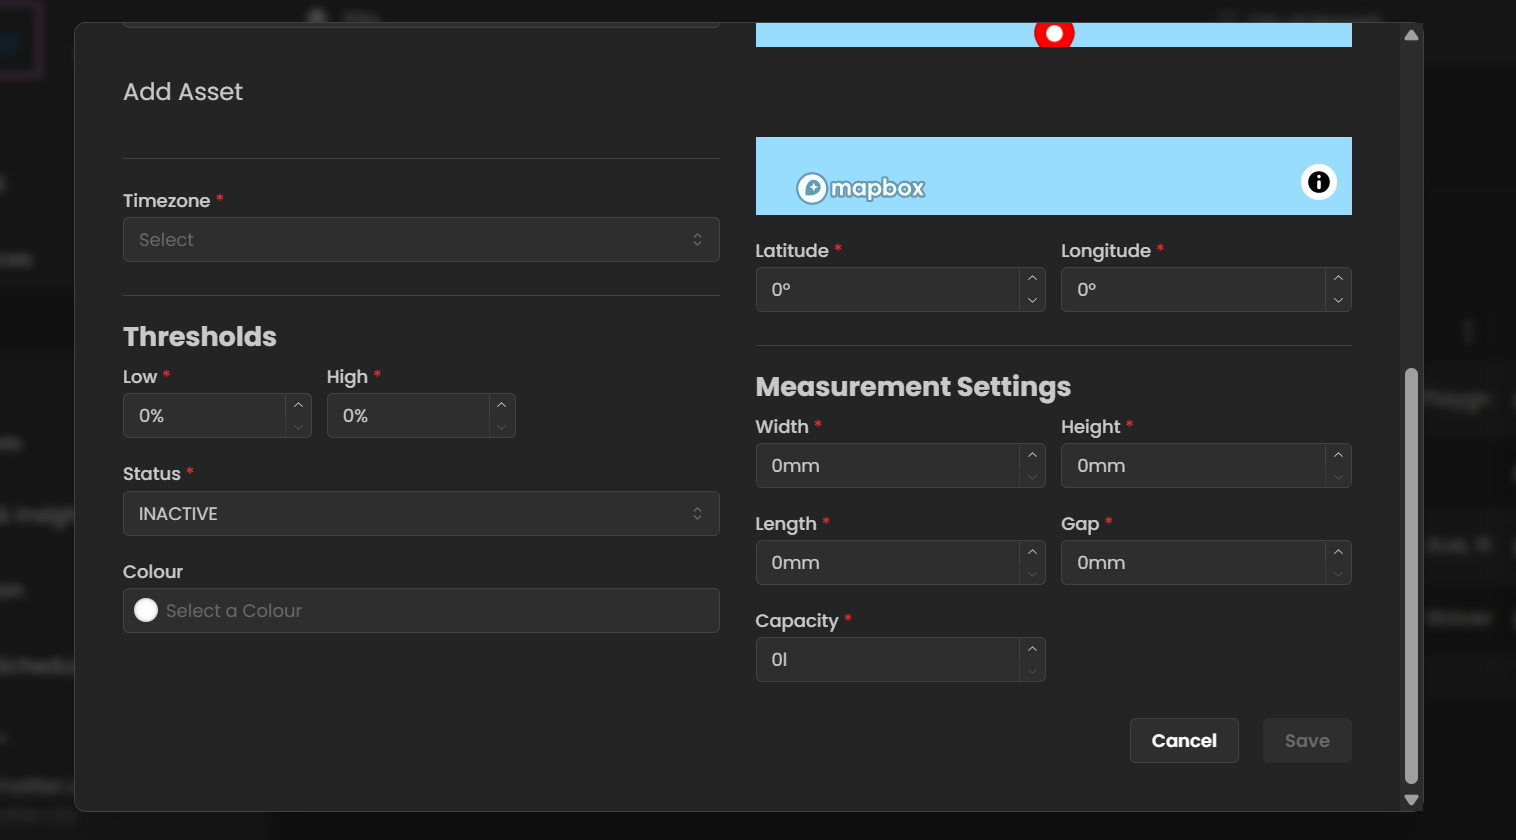
Thresholds & Status
- Low / High Thresholds – Set or update alert levels.
- Status – Choose or modify operational status (e.g., Active, Inactive).
- Colour Coding – Assign a colour for quick dashboard identification.
-
Geolocation
- Add or correct latitude and longitude for accurate mapping.
-
Measurement Settings
- Define or adjust width, height, length, gap, and capacity.
-
Images Tab
- Upload images to visually document the asset.
- Useful for inspections, condition tracking, or providing context.
- Update existing images as the asset's condition changes.
-
Notes Tab
- Add notes for extra details, inspection outcomes, or operational comments.
- Review and update notes as the asset history evolves.
-
Save or Cancel
- Save – Confirm your new asset or update existing records.
- Cancel – Discard changes.
Bulk Upload
The Bulk Upload feature allows you to quickly add multiple assets at once using a CSV file.
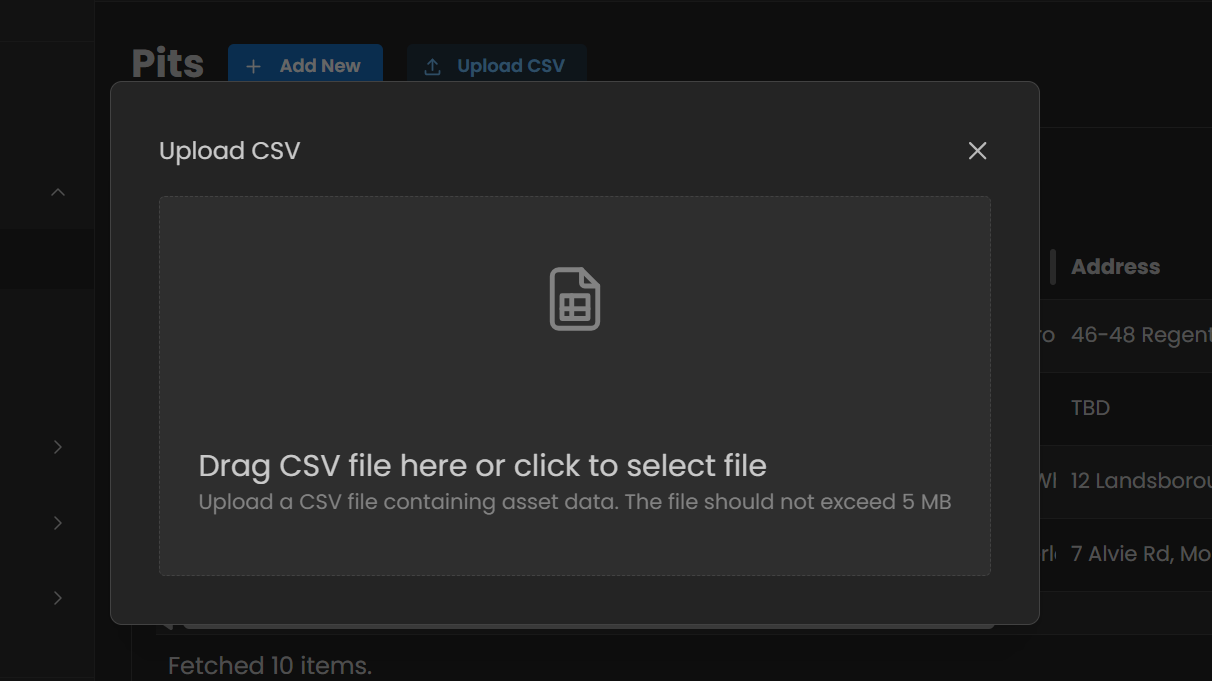
- Open Bulk Upload – Click the Upload CSV button in the Pits or Devices section.
- Upload File – Drag and drop your CSV file into the window, or click to browse and select it.
- File Requirements – The file must be in CSV format and should not exceed 5 MB in size.
- Asset Data – Each row in the CSV represents an asset and should include required fields such as name, type, address, and key details.
- Review & Save – Once uploaded, the system processes the data and creates new asset entries automatically.
Devices
The Devices module provides a centralised list of all devices linked to assets across your organisation.

- Navigation – Access this section from the left-hand sidebar under Pits & Devices > Devices.
- Add New – Use the + Add New button to manually register a new device.
- Refresh – Click Refresh to update and view the latest device information.
- Search & Filter – Use the search bar to quickly find devices, or adjust the display with list/grid options.
- Device Records – Each row includes details such as device ID, IMEI number, address, and status.
- Status Indicator – Device states (e.g., Active)
- Edit Option – Use the pencil icon to update device information.
- Scroll & Load – More devices are automatically loaded as you scroll down.
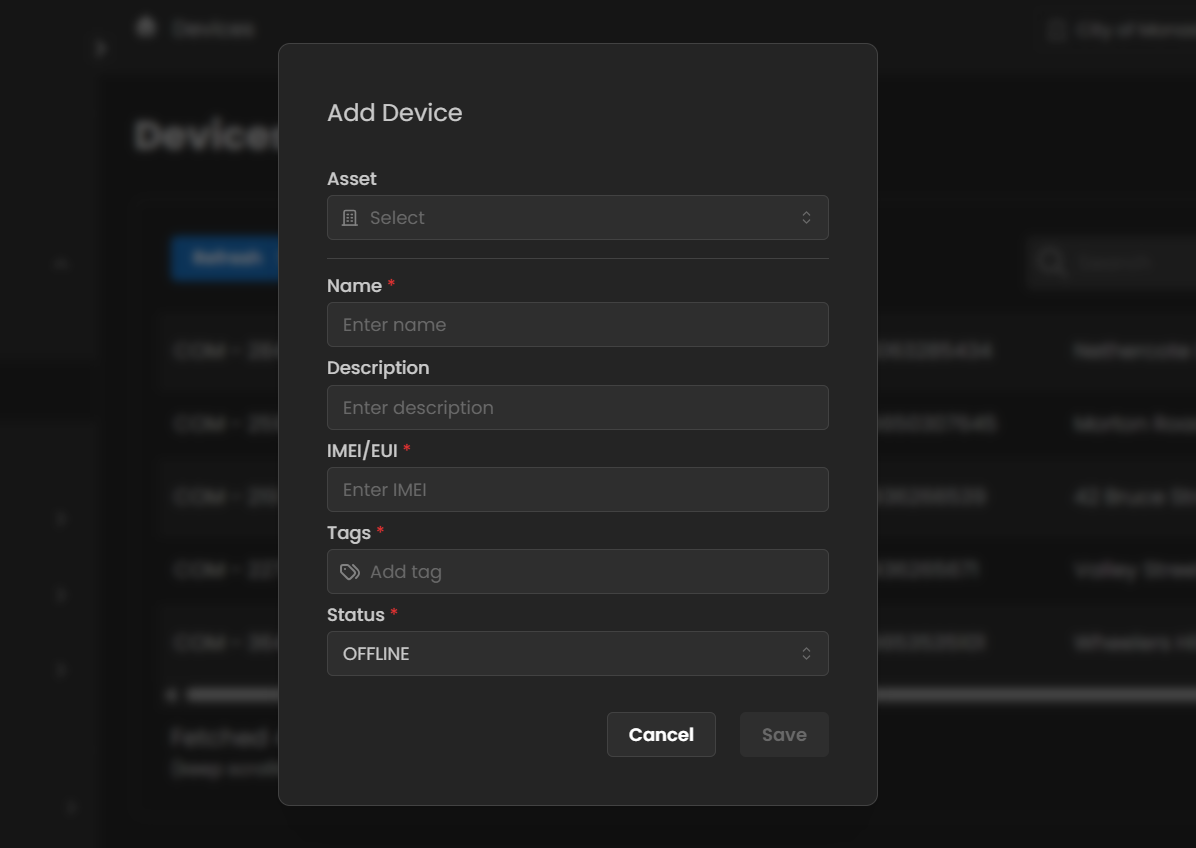
Add or Edit a Device
The Device panel is used for both adding a new device and editing an existing one, providing a single, consistent interface.
-
Open the Panel
- Add Device – Click the + Add New button to open the device panel with blank fields.
- Edit Device – Click the pencil icon next to a device to open the same panel, pre-filled with existing details for updates.
-
Device Information
- Asset – Select the pit or asset the device is linked to.
- Name – Enter a name for a new device, or update the existing one.
- Description – Add or refine descriptive details.
- IMEI/EUI – Provide or update the device's unique identifier.
- Tags – Apply or update tags for easier classification and filtering.
- Status – Choose or modify the device status (e.g., Active, Offline).
-
Save or Cancel
- Save – Confirm the new device or update existing records.
- Cancel – Discard changes.
Bulk Uploads
The Bulk Uploads module allows you to manage and track all CSV uploads for pits and devices.
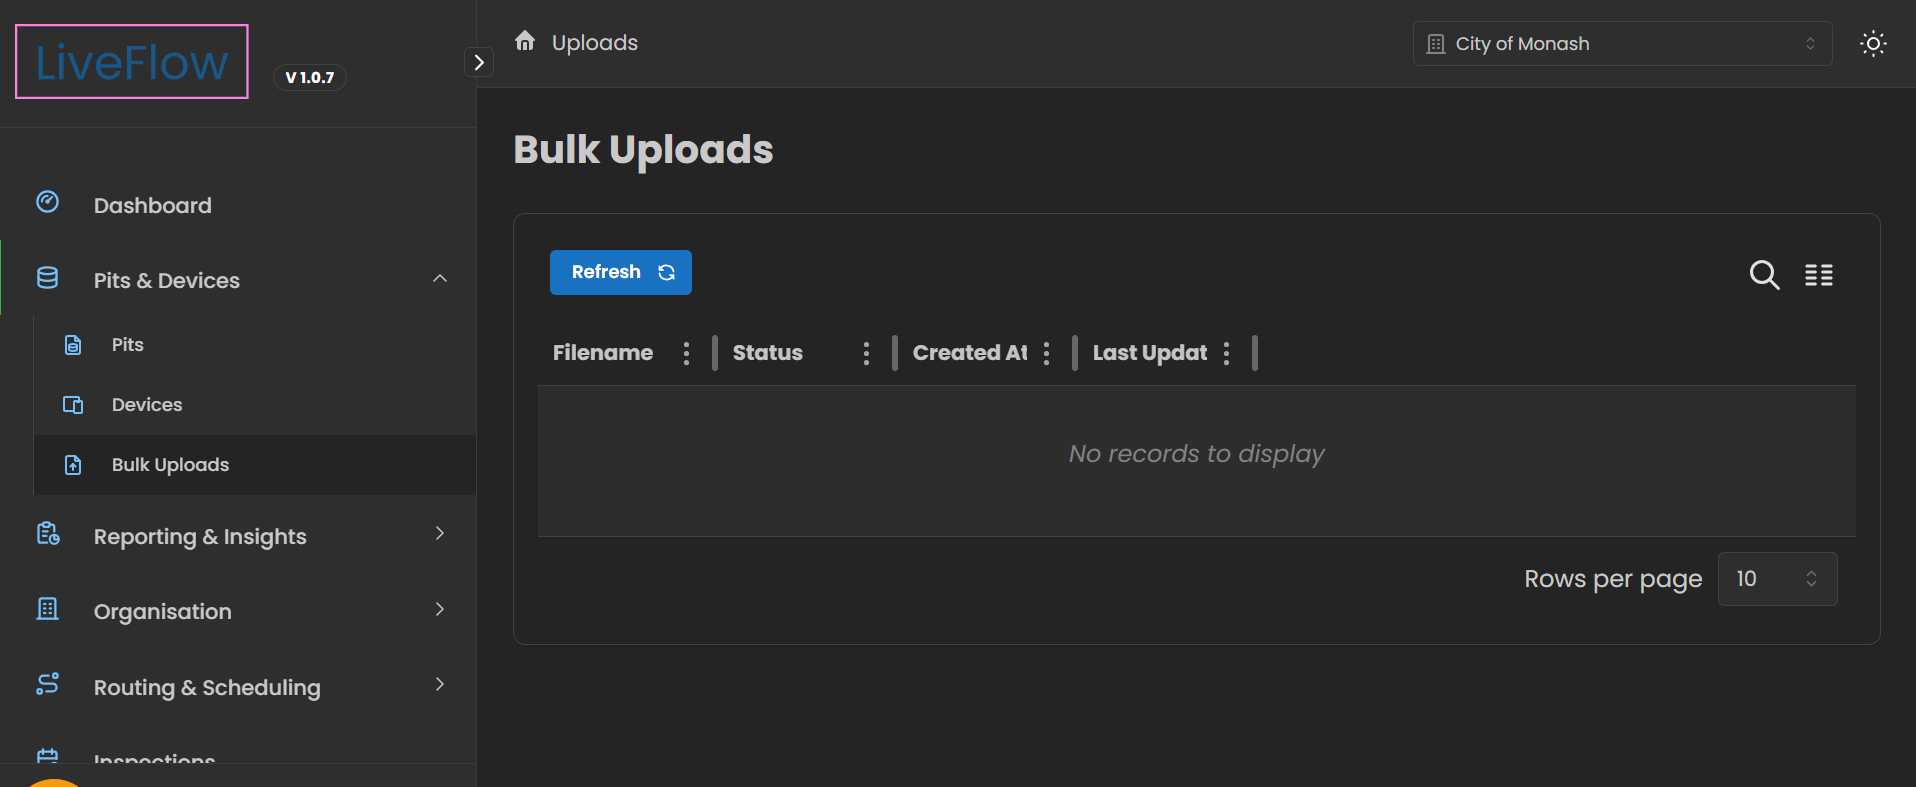
- Navigation – Access this section from the sidebar under Pits & Devices > Bulk Uploads.
- Upload CSV – Use the Upload CSV option in the Pits or Devices module to start a new bulk upload.
- Uploads List – Once uploaded, each file is displayed in a table with the following details:
- Filename – Name of the CSV file uploaded.
- Status – Indicates whether the upload is processing, successful, or failed.
- Created At – Timestamp of when the upload was initiated.
- Last Update – Timestamp of the most recent update to the file's status.
- Refresh – Use the Refresh button to check the latest upload results.
- Search & Filter – Search by filename or filter results to quickly find a specific upload.